
The Dragon
I began with cardboard and Celluclay models of the head and the lower jaw. Celluclay is a type of powdered paper mache that holds detail well.


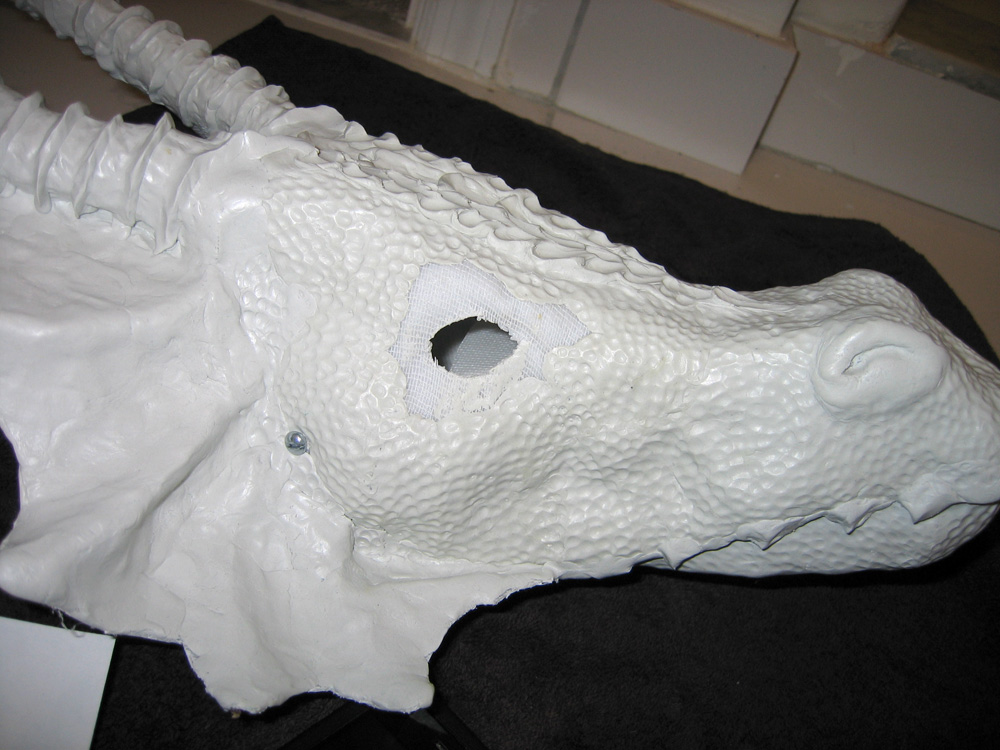
To create the head, I draped Altraform plastic over the Celluclay. Altraform is a cloth covered in plastic. After I heated it with a paint stripper to about 160°F, it became soft and sticky, and I could tuck and press it into every contour of the head. Once it cooled, I had a lightweight and very sturdy plastic final head.


All of the dragon's scales and features are sculpted in Apoxie, a two part clay that air dries. It was great for detail, but it is a heavy material, and that ended up making the head pretty heavy and hard to hold up.


Time to unite the upper and lower jaw so I can figure out where the hinge will be. After that, I added crafting wire to support the frill and horns.


It took a while to get the frill on both sides of the head to be fairly symmetrical. I had secured the guide wires with the hot glue gun, and when I brought the heat gun close to the wires to heat up the Altraform, it would melt the glue holding up the wires.
With the frill in place, I added an inside to the mouth on the upper and lower jaws.


I covered the frill and horns with Apoxie and patterned the horns with some ridges. I really like the way they turned out.

I bought adorable little Christmas snowglobes... and cut them in half! Muahahah.
I tried filling them with hot glue gun glue, but it melted them (which was pretty cool, but not the look I was going for). Fortunately I had a spare.
I filled each half with clear glue, and let them dry; then I inserted a pupil of black Fimo clay.

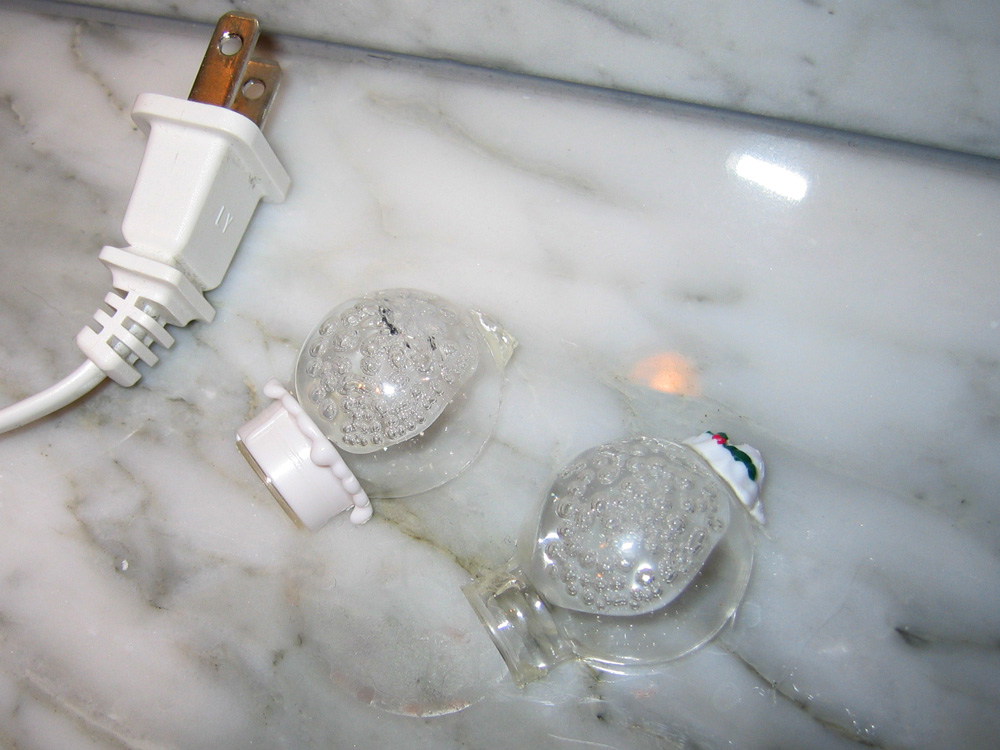

I painted the back of the glue green for the iris. Behind the eyes, I positioned rice lights running off a battery. Since the head would have a lot of water going through it, I sealed them in plastic cut from sandwich bags stuck together with hot glue.


Originally I wanted to squirt slime, but I decided that hitting a kid (or parent) with water would probably be a lot less likely to get me in trouble :)
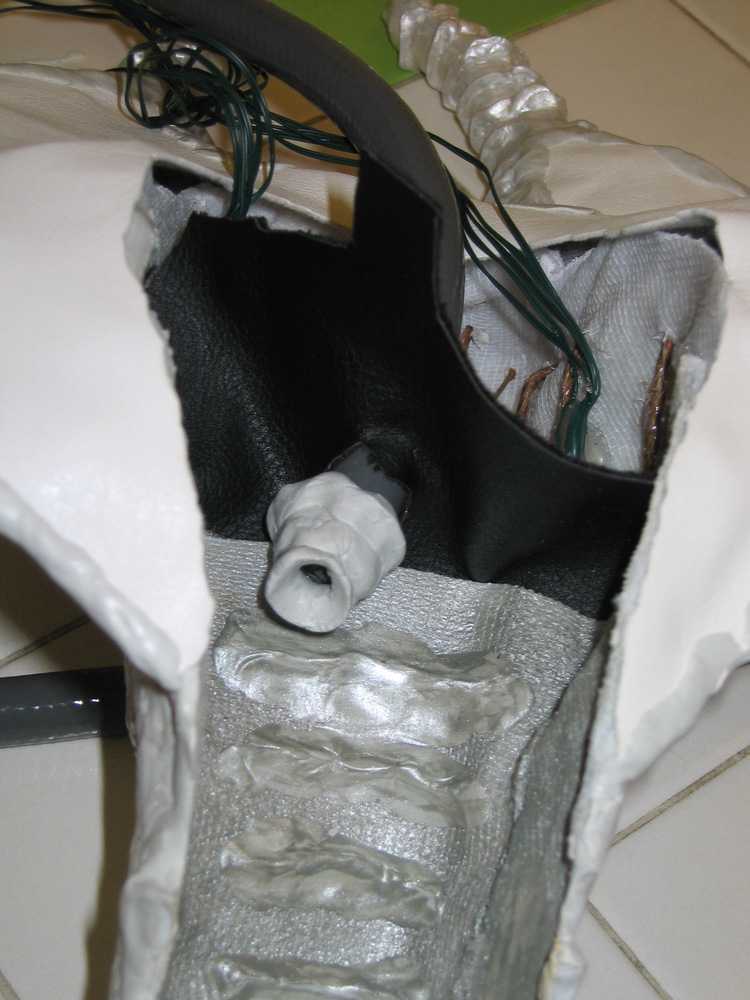
To squirt, I bought an engine primer hose with a one way squeeze pump built in. I glued the hose into the 'throat' of the dragon. As the hose had to enter the throat at an angle due to the presence of my hand, I added a molded piece of clay to bend the stream of water slightly so it would come straight out of the mouth.

I painted the head with an undercoat of white, and then a layer of pearl acrylic paint. Over that I put a coat of Shellac to make it water-resistant. Unfortunately the shellac coat came out uneven and gave it a dull yellow color.


At this point, it was the night before Halloween and I had run out of time. I had planned to make a neck covered in scales, with stuffing on the inside to make it wider than my arm. Instead I made a very simple neck out of white fake leather.
The Well
One of the biggest challenges was creating the table that would make up the base of the well. I had to plan based on what would fit in our small car, and so it is made of several pieces of wood screwed together. It is not beautiful, but it turned out to be surprisingly strong.


I had intended to decorate all the sides of the base with a 3d stone pattern of Celluclay, but I ran out of time, so I just added a single bat. I painted it black like the rest, and then dry brushed silver on it. I think it came out pretty well for 10 minutes of work.


Halloween
I started with the only breakfast worthy of Halloween...

By the time afternoon came around, I had finished nailing and hot-glue-gunning the well together. Then I added the kiddy pool on top, glued the dragon neck into the kiddy pool, and covered it with a really classy black garbage bag.


At this point, things started going wrong fast.
It turned out that the dragon neck material wasn't water-tight, so soon after I started filling the kiddie pool, water started cascading down under the table. This ruined my plan of having a pool of water for the dragon to be lurking in. I didn't want to leave the kiddie pool empty, so I ran around the yard and gathered up a bunch of leaves.
It was almost time for the children to come, and another problem struck. The clay nozzle on the hose had come off and I couldn't get it to stick back on. Without it, the dragon was just drooling on itself!
At the last minute I made another effort with the hot glue gun, and was able to get the clay nozzle secured to the hose. At last, the dragon was ready!
Suddenly, packs of kids started appearing, and I was ready for them. Most of the kids liked the dragon; a few were scared of it, and one punched it.
The squirting was a big hit, with plenty of screams of both "Squirt me!" and "Don't squirt me!"
There were many questions about how I made it and about how it worked - but those were all directed at my sister who was handing out the candy. No one seemed to realize that there was someone inside the table making it move :)

My favorite trick or treater was a little girl that ran off yelling "You're the best dragon ever!"
Afterword
For many years it was a tradition of mine to make an original Halloween display. For the last several years I had let that tradition lapse as I lacked any new ideas.
While this year everything didn't work out quite the way I intended it to, I was really happy with the end result. I went from an idea to a pretty big and complex display in just over 3 weeks. It was also a great learning experience.
